Getting Started
AstroAPI provides a comprehensive set of endpoints for astrology calculations, chart generation, and interpretations. This guide walks you through creating an API key and making your first request.
Base URL
https://api.astroapi.cloudStep 1: Create an Account
Sign up for a free account at dashboard.astroapi.cloud. After signing up, choose a subscription plan that includes the modules you need.
Step 2: Create an API Key
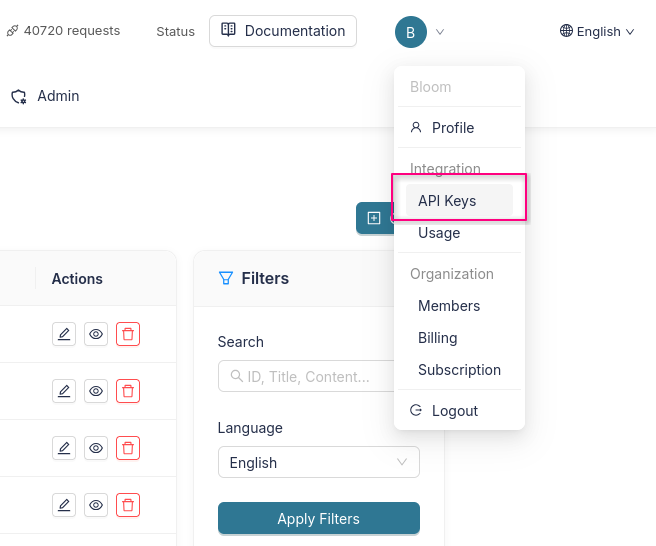
Navigate to API Keys in your dashboard at dashboard.astroapi.cloud/profile/api-keys. You can find it via the profile menu under Integration → API Keys.
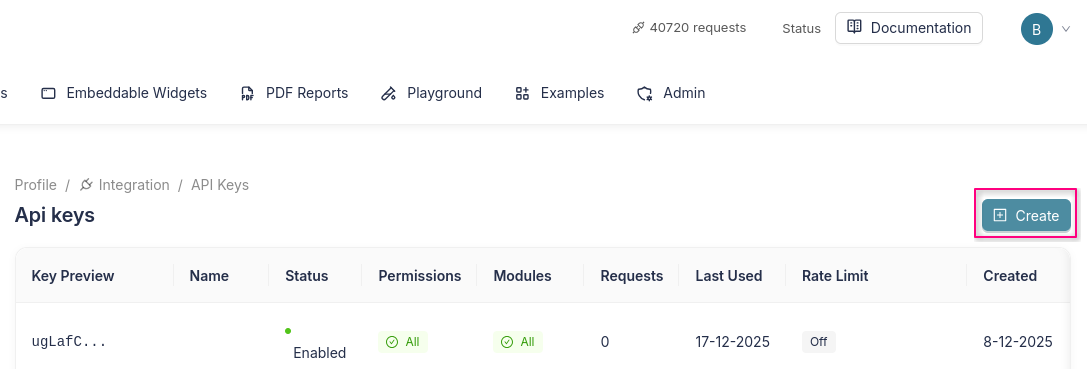
On the API Keys page, click the Create button in the top right corner.
Configure Your API Key
Fill in the following fields:
- Name: Give your key a descriptive name (e.g. "Production" or "Development").
- Expires In (days): Optionally set an expiration. Leave empty for no expiration.
Permissions
Select the permissions your key needs. For natal chart calculations, select:
calc:use— Use calculation API endpoints
TIP
You can check "Use all permissions from my role (owner)" to grant all available permissions to the key.
Modules
Select which modules the key can access. For natal charts, select the following modules:
natal:calc— Natal chart calculations (planet positions, houses, aspects)natal:charts— Natal chart SVG/PNG renderingnatal:texts— Natal chart interpretation texts
TIP
You can check "Use all modules from my organization" to grant access to all modules included in your subscription.
Domain Restrictions (optional)
If your key will be used from a frontend application, you can restrict it to specific domains for extra security. Use * to allow all domains, or *.example.com for wildcard subdomains.
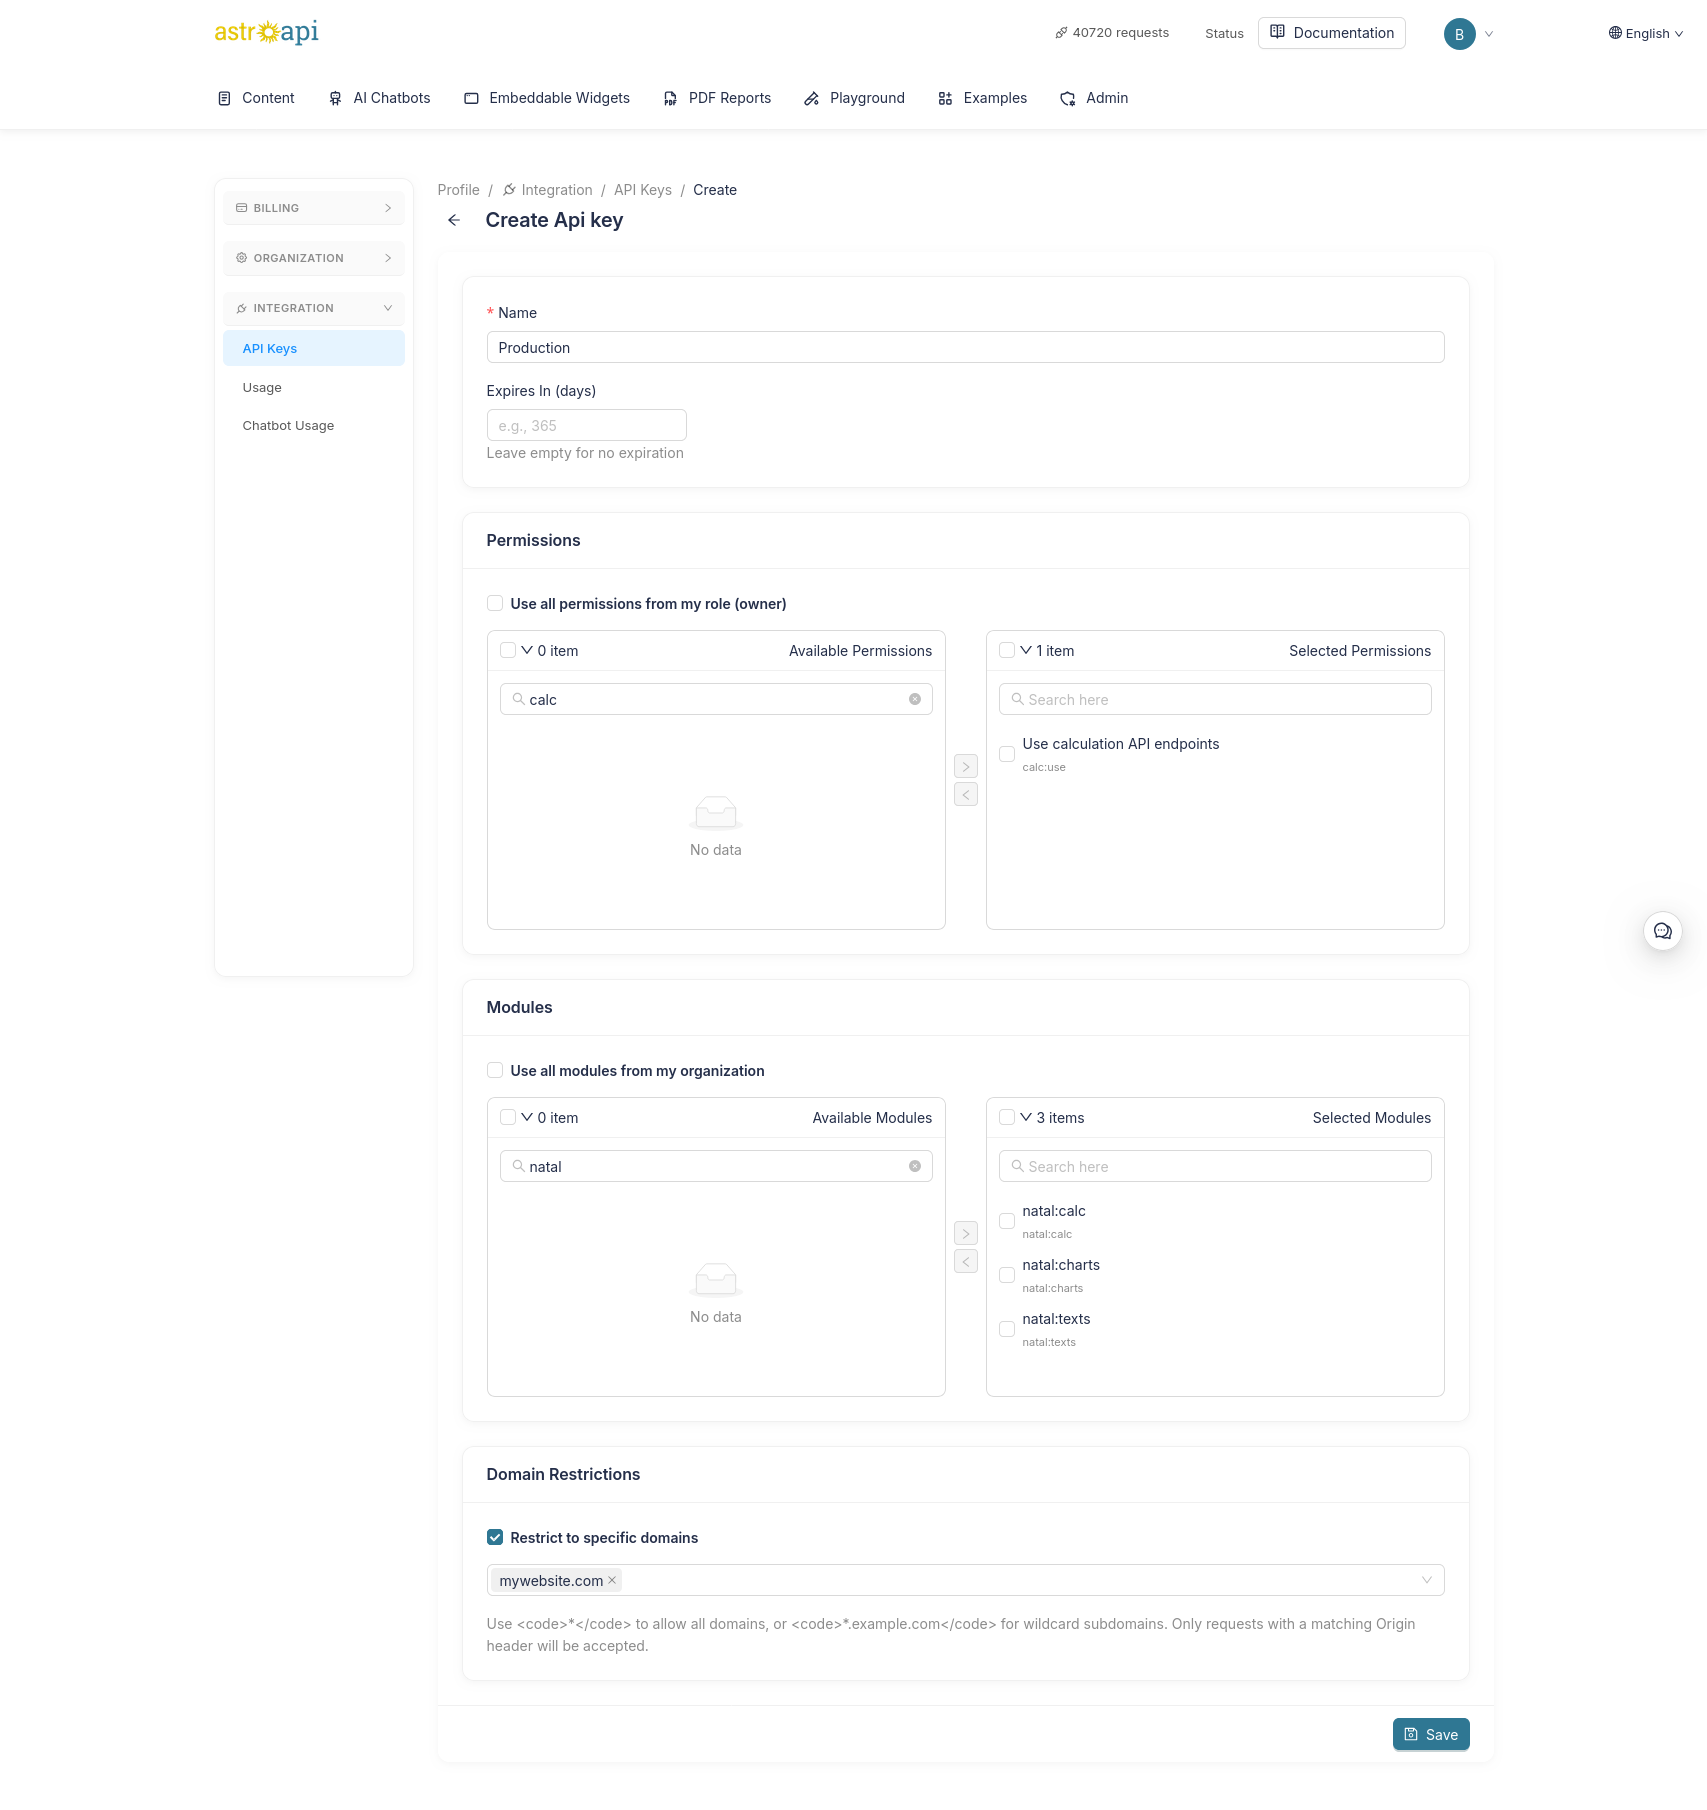
Click Save to create your key. Copy the key immediately — it will only be shown once.
Step 3: Authentication
Include your API key in the X-Api-Key header with every request:
curl -X GET "https://api.astroapi.cloud/api/calc/natal" \
  -H "X-Api-Key: your-api-key"
Step 4: Make Your First Request
Calculate a natal chart by sending a POST request with the birth date, time, and location:
curl -X POST "https://api.astroapi.cloud/api/calc/natal" \
  -H "X-Api-Key: your-api-key" \
  -H "Content-Type: application/json" \
  -d '{
    "dateTime": "1990-06-15T14:30",
    "location": {
      "latitude": 51.5074,
      "longitude": -0.1278,
      "timezone": "Europe/London"
    }
  }'
JavaScript example
const response = await fetch("https://api.astroapi.cloud/api/calc/natal", {
    method: "POST",
    headers: {
        "X-Api-Key": "your-api-key",
        "Content-Type": "application/json"
    },
    body: JSON.stringify({
        dateTime: "1990-06-15T14:30",
        location: {
            latitude: 51.5074,
            longitude: -0.1278,
            timezone: "Europe/London"
        }
    })
});

const data = await response.json();
console.log(JSON.stringify(data, null, 2));
Python example
import requests

response = requests.post(
    "https://api.astroapi.cloud/api/calc/natal",
    headers={
        "X-Api-Key": "your-api-key",
        "Content-Type": "application/json"
    },
    json={
        "dateTime": "1990-06-15T14:30",
        "location": {
            "latitude": 51.5074,
            "longitude": -0.1278,
            "timezone": "Europe/London"
        }
    }
)

print(response.json())
Response Format
All responses follow the JSON:API specification with application/vnd.api+json content type.
Next Steps
- Authentication — Learn more about API keys, permissions, and security
- Natal Charts — Explore all natal chart options and response fields
- Modules — Overview of all available modules
- Rate Limits — Understand usage limits
- API Reference — Explore all available endpoints