Wix Integration
AstroAPI offers Wix integration. Currently the following is supported:
- Natal Horoscope Calculation
Please contact us for specific requests.
What you'll need
- An active trial or subscription
- An API Key
- A Wix website
Edit your Wix website
The integration consists of two parts:
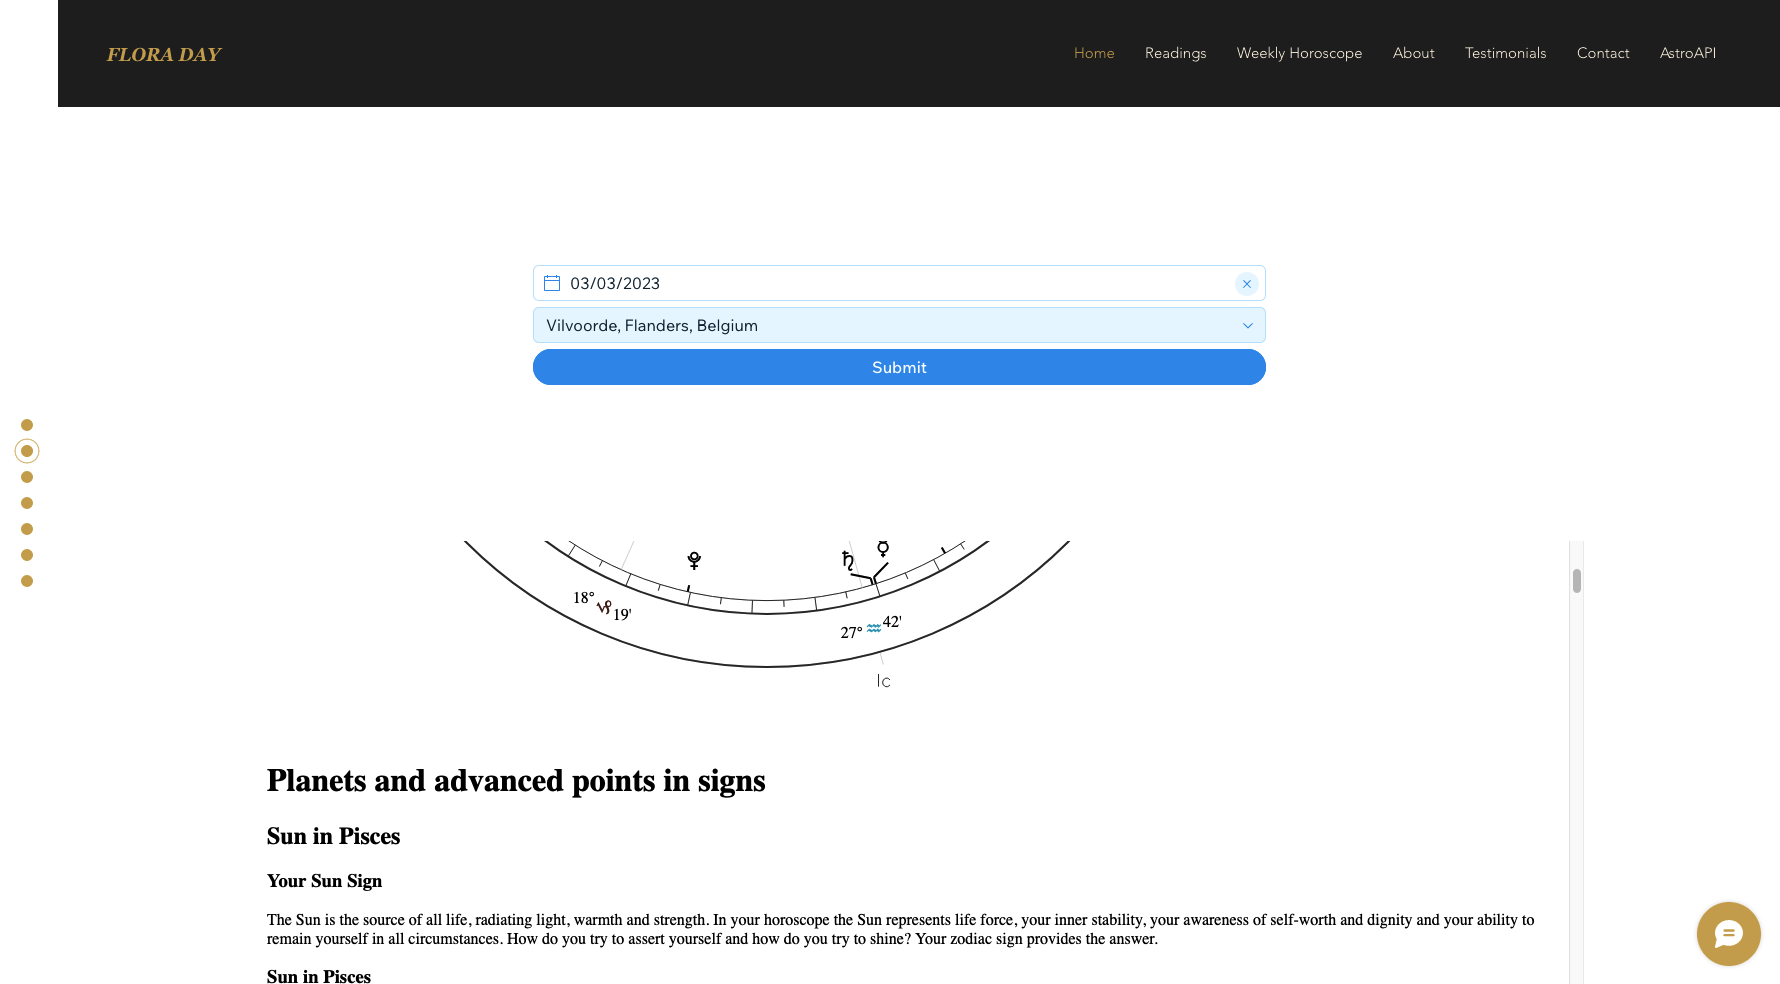
- The form where the user fills in their birthdate and birthplace
- The output where the calculation and text is displayed
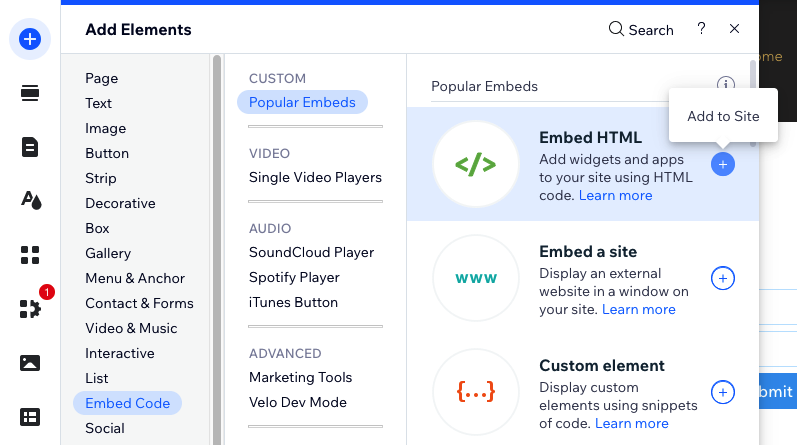
Navigate to the page where you want to integrate AstroAPI. Add the element under 'Embed Code' named 'Embed HTML'.
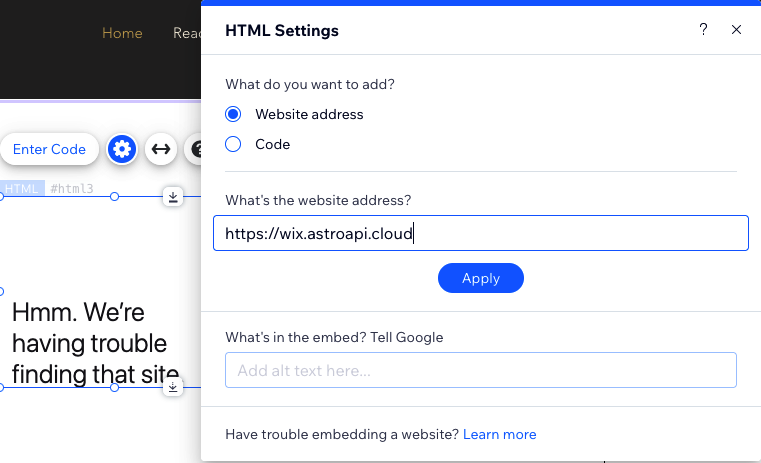
After you add this to your website, the HTML Settings will open. Select 'Website address' and enter https://wix.astroapi.cloud/?apiKey=YOUR-API-KEY-HERE in the field below. Replace YOUR-API-KEY-HERE with your API key.
Change the dimensions of the element so that the form is displayed properly. Take care that some space is required to allow the dropdowns in the form to display. Because Wix displays the form inside an iframe, we cannot display anything outside of its borders.
Now we are going to add an element to display the output. Add a second 'Embed HTML' element repeating the step above. But now in the HTML Settings select 'Code' and paste the code below.
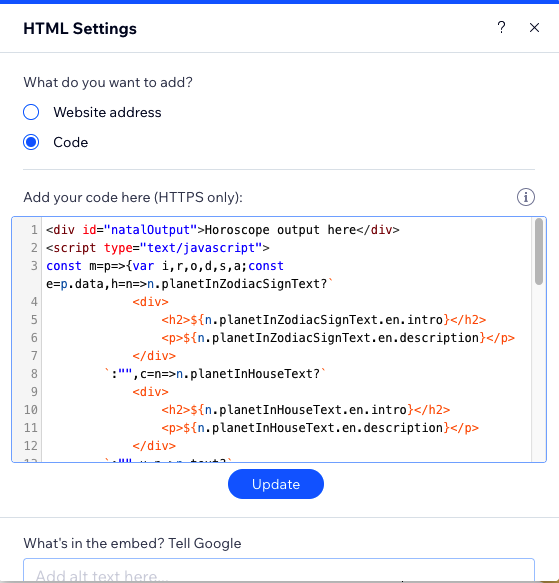
<div id="natalOutput"></div>
<script type="text/javascript">
const m=p=>{var i,r,o,d,s,a;const e=p.data,h=n=>n.planetInZodiacSignText?`
            <div>
                <h2>${n.planetInZodiacSignText.en.intro}</h2>
                <p>${n.planetInZodiacSignText.en.description}</p>
            </div>
        `:"",c=n=>n.planetInHouseText?`
            <div>
                <h2>${n.planetInHouseText.en.intro}</h2>
                <p>${n.planetInHouseText.en.description}</p>
            </div>
        `:"",u=n=>n.text?`
            <div>
                <h2>${n.text.en.intro}</h2>
                <p>${n.text.en.description}</p>
            </div>
        `:"",l=n=>n.text?`
            <div>
                <h2>${n.text.en.intro}</h2>
                <p>${n.text.en.description}</p>
            </div>
        `:"",v=n=>n.text?`
            <div>
                <h2>${n.text.en.intro}</h2>
                <p>${n.text.en.description}</p>
            </div>
        `:"",$=n=>n.text?`
            <div>
                <h2>${n.text.en.intro}</h2>
                <p>${n.text.en.description}</p>
            </div>
        `:"",x=`
<div>
    <div>
        <h1>Wheel chart</h1>
        <img alt="Wheel chart" src="${e.chartUrl}"/>
    </div>
    <div>
        <h1>Planets and advanced points in signs</h1>
        ${(i=e.planets)==null?void 0:i.map(n=>h(n)).join("<br/>")}

        <h1>Planets and advanced points in Houses</h1>
        ${(r=e.planets)==null?void 0:r.map(n=>c(n)).join("<br/>")}

        <h1>House Cusps</h1>
        ${(o=e.houseCusps)==null?void 0:o.map(n=>u(n)).join("<br/>")}

        <h1>Aspects between planets</h1>
        ${(d=e.aspects)==null?void 0:d.map(n=>l(n)).join("<br/>")}

        <h1>Zodiac Points</h1>
        ${(s=e.zodiacPoints)==null?void 0:s.map(n=>v(n)).join("<br/>")}

        <h1>Elements</h1>
        ${(a=e.elements)==null?void 0:a.map(n=>$(n)).join("<br/>")}
    </div>
</div>
    `,t=document.getElementById("natalOutput");if(t)t.innerHTML=x;else throw new Error("Element with id natalOutput not found")};window.addEventListener("message",m,!1);

</script>
You can edit the code (mainly the HTML that is generated) if you want to make changes.
Publish your changes
Now preview or publish your changes to try it out. After filling in the form and pressing 'Submit' you should see the output in the second element you added.